Now that we are past the middle of the semester (that went FAST!) I wanted to do a recap of what we have tried to accomplish to this point. Some of these should hopefully answer some questions we have had come up recently, but more importantly, can be a reference for the future. Please let me know if any of this information is not clear.
1:The Pipeline:
Here is a simple graph of the pipeline we are following (Fancy Hypergraph node-breakdown - ha):
Understanding "why" each of these steps in necessary is more important than understanding "how" they are done. The "how" changes all the time, while the "why" rarely ever changes.... What the heck does that mean?
Well, take retopology for example. the step of retopo represents the ability to make a mesh that can animate and can hold explicit texture coordinates via UVs). Furthermore, the high-resolution mesh can have details baked down to the low-res mesh. All of that is the "why" Why retopo? to make a light-weight mesh with UVs. Before the modeling toolkit was added to Maya, I used to use topogun to retopo. Before topogun, I used to use Zbrush. See, the "how" changes whenever new tools evolve, but the need for a retopoed mesh has not changes for a long time. "Why" over "How"...
2:The Sculpt.
The nice thing about Zbrush is you can concentrate on just the shape of the model with very little attention given to the technical parameters of models. In essence, you can just focus on the art and save the technical part of modeling for later. In the image below, the head geometry is dynameshed, and has far too many polygons to animate or render efficiently.
Since the mesh in the image above has too many polygons, we need to retopo it to capture the basic shapes. The other aspect of re-topology that's really important is to direct the flow of edges in a manner that is conducive to good deformation (more on this below).
For retopology, we have been using Maya and the modeling toolkit. Sometimes, the mesh in Zbrush is comprised of millions of polygons. Maya can't handle that many polys, so you might have to use decimation master in Zbrush first. In the image below, I used decimation master and decimated the head geometry from 3.7 million polygons, to 74 thousands polygons. I usually try to keep meshes under 100 thousand polys when importing them in to Maya.
2:Decimation:
In the above image, I use decimation master (found under the Zplgin Menu) to reduce the mesh. The steps are:
1: Drag the percentage slider all the way to the right. This will update the the poly numbers when you slide it back to the left. The number is represented in thousands of polys. I made my number about 3% which gave me about 74 thousand polys.
2: After setting the number you want, hit pre-process current. This can take a few minutes. Zbrush is evaluating the shape of the model during this step.
3: Once the pre-process is finished, you can simply hit Decimate current and it should give you a new, triangulated mesh with the number of polygons you specified in step 2.
One last thing before exporting an obj. to Maya. In the geometry tab (on the right side of the screen, pictured below) look under the "mesh Integrity" section and hit "Fix Mesh". This will delete any stray polygons that might prevent Maya from reading the obj. If you ever get a mesh that can't be imported in to Maya, try this step first. I usually do it before I export a mesh to Maya.
 3: Retopo:
Once I have imported the decimated mesh as an obj in to Maya, I can start to retopo.
1: I usually make a later with the retopoed mesh assigned to it. This allows me to hide and show the mesh easily.
2: Next, with the decimated mesh selected, hit the "make live" button (the little single magnet icon).
3: Once the mesh is live, you can hit "quad-draw" in the modeling toolkit. If you don't see the modeling toolkit, try making sure the modeling toolkit icon is pressed (3).
Once the above steps are done, you can lay out dots on the model, and hold the shift key to fill in the dots.
You can also use the cntrl key to insert edgeloops inside existing strips of polygons. Remember, create the big roadways first, then the smaller edges that follow those roadways after! If this does not make sense PLEASE LET ME KNOW, it's a HUGE concept for this stuff!
You can also extrude or extend edges too. If you hold tab and the middle mouse button, you can drag out entire edge loops. If you hold tab and left mouse, you will extend a single edge.
You can also slide vertices around on the decimated mesh using the middle mouse button. If you hold the "B" key you can use soft selection to move multiple vertices.
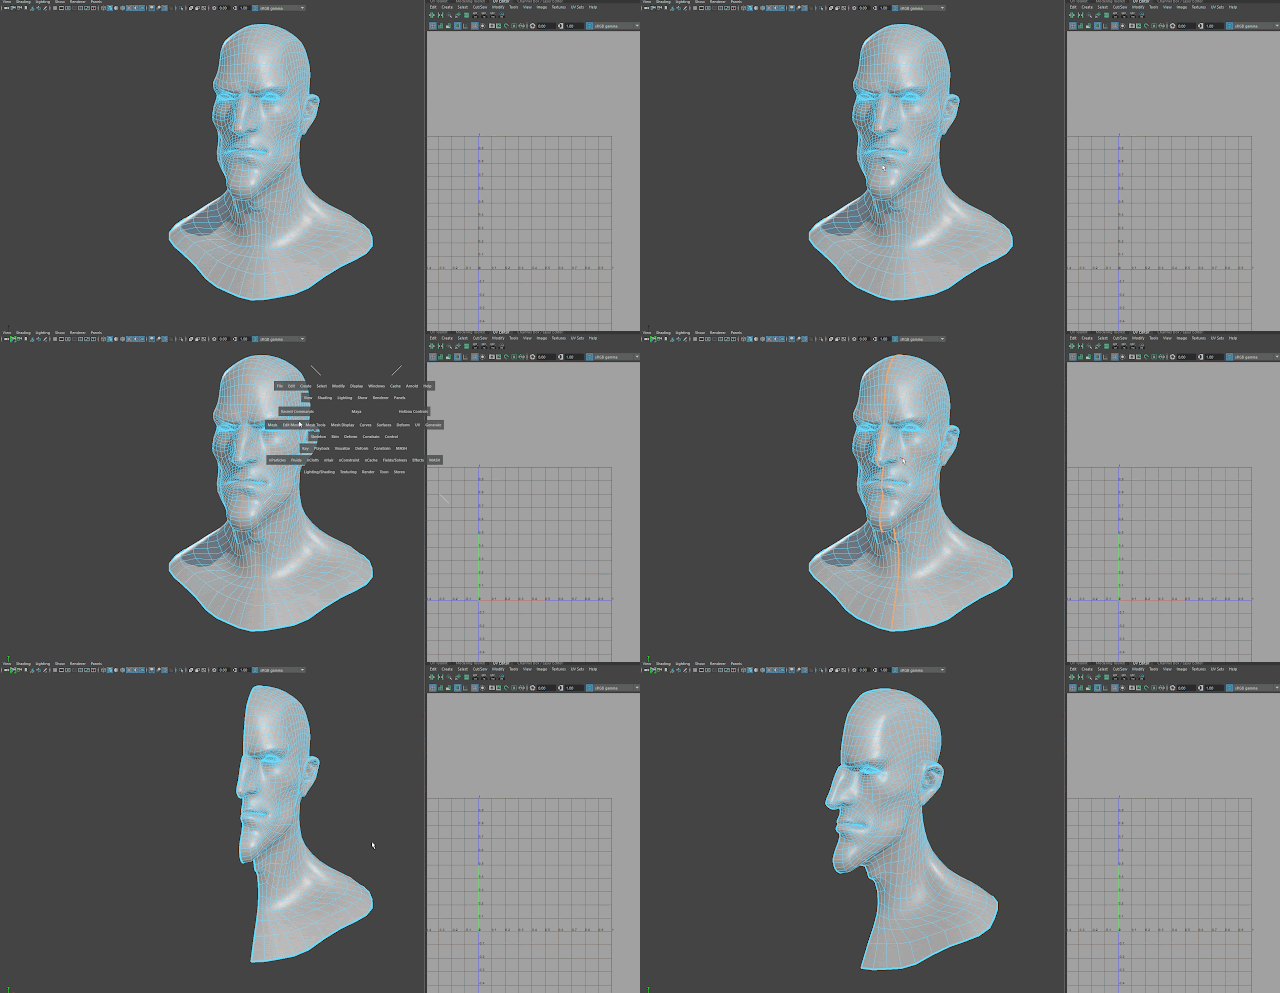
This is what a pass at the topology on this character looks like when completed.
Remember, the
"big" roads are more important than the "
smaller" marks on the road.
So,when retoping, if we establish the "Big" Roads first, the smaller roads just follow. This important for achieving good deformation.
4: UV layout:
Once you have a general retopo you like, we can move on to UVs. Good Uv's require an understanding of how the model will move and be viewed through the camera in a game, movie, commercial, etc. There are a LOT of variables related to how the UV's should be laid, many of these we will discuss in class. Here are the basic steps using Maya's tools. I do use RoadkillPro, but you don't have to. You can also just use the standalone roadkill as well. Again, these images represent basic Maya UV layout tools:
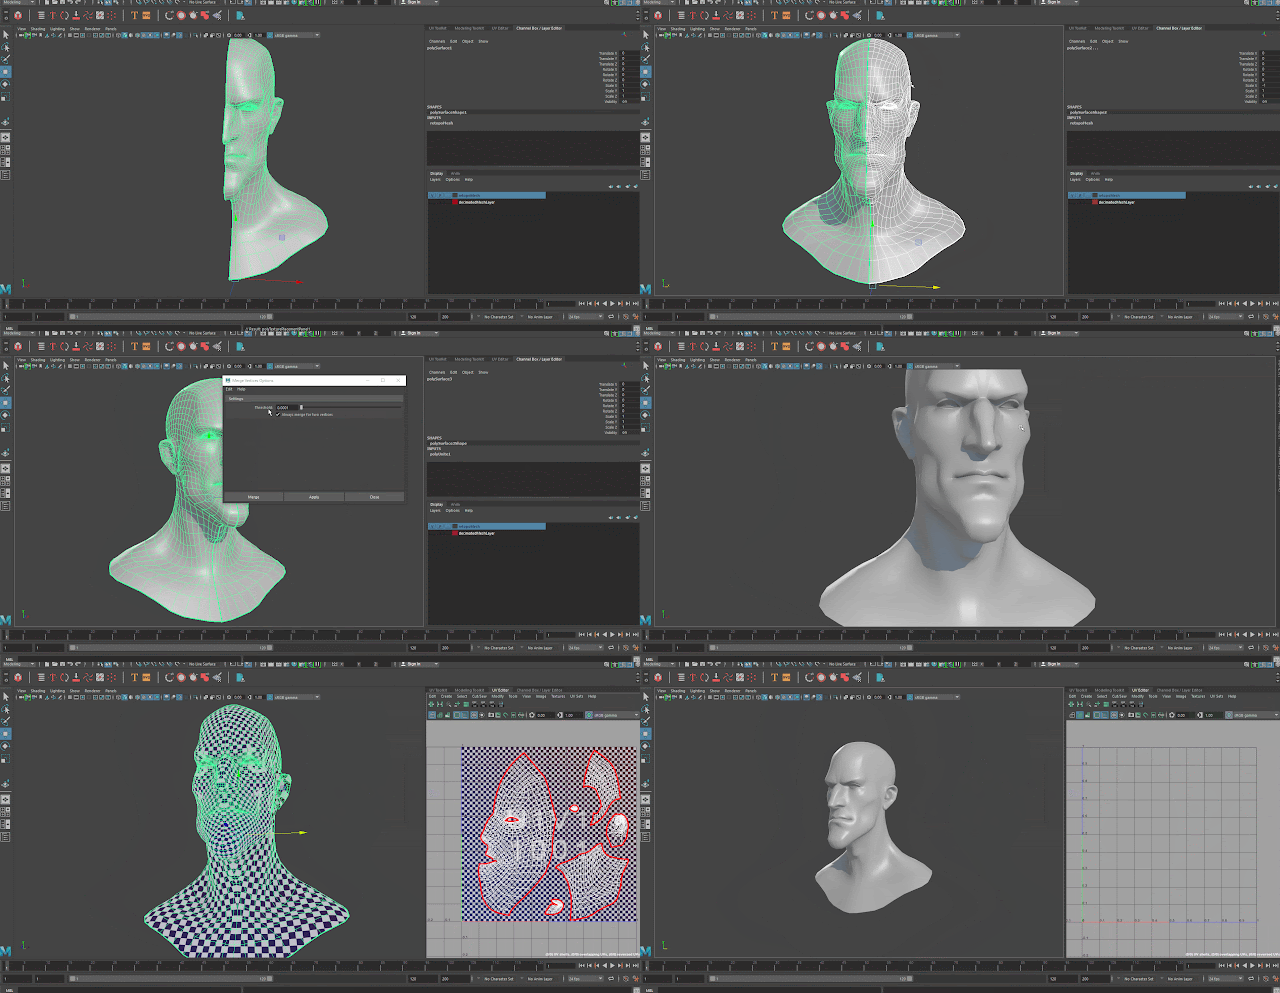
First: Let's cut a symmetrical model in half. I double click the center edge (this should always be a clean edgeloop to make this easy later). Next, I hit mesh>>Detatch. This splits the edges and verts along that middle line. Then, I go in to face selection mode, double click on one side of the model, and delete those faces.

Next, I project UVs on the model based on the camera view. The overlapping and distortion is NOT important since we will cut the UV shells and lay them out later. This step is only important because it assured you have a UV coordinate assigned to each face.
Now that I have the basic camera projection, I can start cutting up the UV shells. This step is important because it allows you to minimize distortion of the UV's on the model. Double clickk and edgeloop or manually select edges, then, in the UV editor go to Cut/Sew and cut. If you have the Texture Border option turned on in the UV Editor, it can show the edge thicker, and whatever colors you specify (for me, it's red and 4 times thicker than a regular edge.
After the edges are cut, I choose Modify>>Unfold in the UV editor window. This will unfold the shells and try to give you less distortion. If your cuts are along the correct edges, this usually does a good job. Then, I can go in to face selection mode, and manually double click the UV shells in the UV editor to move them around.
Please note, the shells are NOT proportional to their modeling counterparts at this point. For example, the ear is tiny here. If I want them to be proportional to one another based on the relative scale of the corresponding faces in world space, I can use the Modify Layout option in the UV Editor. This will scale the meshes to correspond to the world space model, but also move the shells so they don't overlap.
Much of the time however, you want to direct how much space each shell takes up. For example, the face will have more textural detail than the top of the head, ear or neck, so I can manually scale those UV shells to take up more space in the layout. More space in the layout means more texels to display on the mesh later.
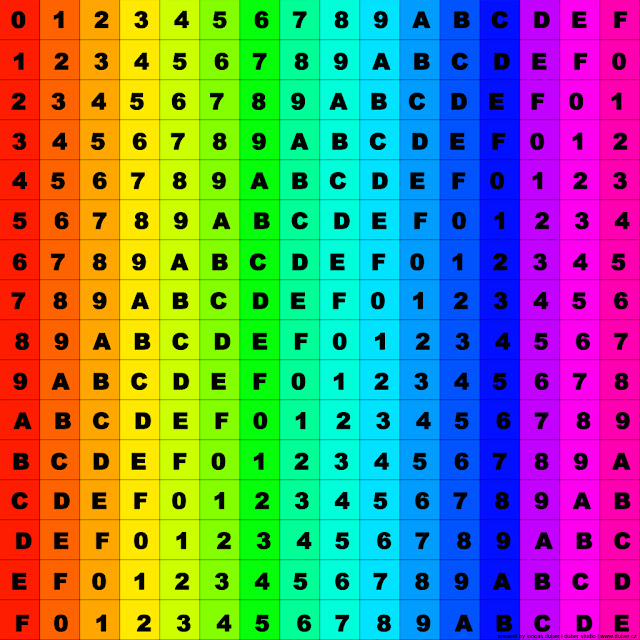
If you want to check how the stretching is looking on a model, you can use the texture option in the UV Editor. For me, I prefer to use a texture map with more information in it (see below, feel free to download it too :-).


Now, let's re-mirror the geometry. First, select all the edges or vertices along the center line of the face and make sure they are snapped to 0 in the X axis. I type "0" (no quotes) in the transform window at the top of the UI, or just hold the x key and snap them to "0" in X from the front view. Next, I duplicate the model (make sure the pivot is centered at 0,0,0 in world space) and give it a negative scale in X. Then, select both meshes, and use the Mesh Combine command followed by the edit mesh>>Merge command. I set my merge options to something minuscule like .0001 -- otherwise, you might inadvertently weld together vertices you don't want to. Finally, I use the Mesh Display>>Soften edge command with the entire model selected. This should make all the edges look soft with no seams. The UVs will also be overlapped at this point.
More to come on this.... I'll update this post more with UVs and baking. But for now, I have to get some Zzzzzzzzzz.


